Showing posts with label home fix-up. Show all posts

Saturday, August 17, 2013

Collection of Links


We’ve collected some great blog posts and articles that we think you will enjoy. Let us know if you think one is more useful than another, and if you implemented any of the ideas presented here.

In our household we have too much (according to this article from Apartment Therapy) of all 10 of these things. We’re working on it, and to start we picked sheets. We’re probably least emotionally attached to those, although we do like our sheets.


USUALLY you get some of your money back when you sell your improved home. However, be sure to check conditions in your area. Most of the time the cosmetic, somewhat quick improvements like painting pay off. Sometimes bathroom and kitchen improvements pay off, but it depends on how much you spend, and it’s sooooo easy to overspend. Be careful here, and be sure to take your Realtor’s advice.


The answer for Buyers is probably, “Not fast enough!” Well, a real estate transaction today is almost always not fast enough for anybody involved in the transaction. This article helps Buyers get everything lined up to have the fastest possible transaction, which, again, is almost always, “Not fast enough.”


In many local residential areas, it’s very easy to get very carefree about leaving our things out and about, and not worrying about theft. But, we can all be just a little more conscientious about our possessions, and making our property less inviting to burglars.


This article suggests how we can prevent the common household problem. The video explains how to get rid of it once we get it, which we probably all do at one time or another.


Saturday, May 18, 2013

Week-End Project: Organize Your Garage

We were thinking about doing this project. Not this week-end. Some week-end in the near future. Really!

How about you? Looking for a week-end project? Does your garage need organizing? Here's some tips and a video.

The setup: Shopping for garage storage solutions is definitely a kid-in-the-candy-store experience. There are so many cool shelves, hooks, and hangers available that you’ll need to prioritize your needs. Take stock of long-handled landscape tools, bikes, paint supplies, ladders, and odd ducks, such as that kayak. Measure your available space so you’ll have a rough idea of where everything goes.

Specs and cost: Set your under-$300 budget, grab a cart, and get shopping. Many storage systems are made to be hung on drywall, but hooks and heavy items should be fastened directly to studs. Use a stud finder ($20) to locate solid framing.

If your garage is unfinished, add strips of wood horizontally across studs so you’ll have something to fasten your storage goodies to. An 8-foot-long 2-by-4 is about $2.50.

Tools: Cordless drill/driver; hammer; level; measuring tape; screws and nails.

Time: This is a simple project, but not a fast one. Figure 6-10 hours to get everything where you want it, plus shopping. But, oh the fun in putting everything in its place!


Wednesday, May 15, 2013

Spruce Up Ideas for the Front of Your House


front door11 Ways to Create a Welcoming Front Entrance for Under $100
from HouseLogic, by Cara Greenberg
Wouldn’t it be nice to approach your home’s entrance with a grin instead of a grimace? Take our tips for beating a clear, safe, and stylish path to your front door.

First impressions count — not just for your friends, relatives, and the UPS guy, but for yourself. Whether it’s on an urban stoop or a Victorian front porch, your front door and the area leading up to it should extend a warm welcome to all comers — and needn’t cost a bundle.

Here’s what you can do to make welcoming happen on the cheap.

1. Clear the way for curb appeal. The path to your front door should be at least 3 feet wide so people can walk shoulder-to-shoulder, with an unobstructed view and no stumbling hazards. So get out those loppers and cut back any overhanging branches or encroaching shrubs.

2. Light the route. Landscape lighting makes it easy to get around at night. Solar-powered LED lights you can just stick in the ground, requiring no wiring, are surprisingly inexpensive. $45 for a pack of 8, lowes.com.
3. Go glossy. Borrow inspiration from London’s lovely row houses, whose owners assert their individuality by painting their doors in high-gloss colors. The reflective sheen of a royal blue, deep green, crimson, or whatever color you like will ensure your house stands out from the pack. Consult Bonnie Rosser Krims’ book, The Perfectly Painted House, for ideas.

And find out what your front entryway says about you.

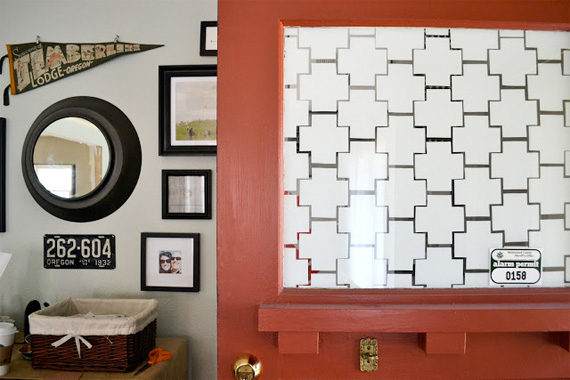
front door glass4. Pretty up the view. A door with lots of glass is a plus for letting light into the front hall — but if you also want privacy and a bit of decor, check out decorative window film. It’s removable and repositionable, and comes in innumerable styles and motifs. About $5.25 per running foot, decorativefilm.com.

An less expensive way to get the look of stained glass without doing custom work or buying a whole new door: Mount a decorative panel on the inside of the door behind an existing glass insert, $92 for an Arts and Crafts-style panel 20” high by 11” wide.

5. Replace door hardware. While you’re at it, polish up the handle on the big front door, or better yet, replace it with a shiny new brass lockset with a secure deadbolt, $57.

6. Please knock. Doorbells may be the norm, but a hefty knocker is a classic that will never run out of battery life, and another opportunity to express yourself (whatever your favorite animal or insect is, there’s a door-knocker in its image). $39, potterybarn.com.

7. Ever-greenery. Boxwoods are always tidy-looking, the definition of easy upkeep. A pair on either side of the door is traditional, but a singleton is good, too. About $25 at garden centers. In cold climates, make sure pots are frost-proof (polyethylene urns and boxes mimic terracotta and wood to perfection). $80, frontera.com.

8. Numbers game. Is your house number clearly visible? That’s of prime importance if you want your guests to arrive and your pizza to be hot. Stick-on vinyl numbers in a variety of fonts make it easy, starting at about $4 per digit.

doormat9. Foot traffic. A hardworking mat for wiping muddy feet is a must. A thick coir mat can be had at the hardware store for less than $20, or spring for something fancier, like this decorative half-round that promises weather and mildew resistance, $45, frontgate.com.

10. Go for the glow. Fumbling for keys in the dark isn’t fun. Consider doubling up on porch lights with a pair of lanterns, one on each side of the door, for symmetry and twice the illumination. $69 each, shadesoflight.com.

11. Snail mail. Mailboxes run the gamut from kitschy roadside novelties masquerading as dogs, fish, or what-have-you to sober black lockboxes mounted alongside the front door. Whichever way you go, make sure yours is standing or hanging straight, with a secure closure, and no dings or dents. The mail carrier will thank you.

Cara Greenberg is a veteran writer on architecture, design, and gardens for magazines and newspapers, including This Old House, Coastal Living, and Garden Design. Her blog, casaCARA: Old Houses for Fun and Profit, is based on her experience owning six properties.

Monday, March 18, 2013

How To Prepare Your Home For The Photo Shoot


camera on tripodYou’ve heard it before, you only have one chance to make a first impression. A prospective buyers 1st, 2nd and sometimes 3rd impression of your home is online, so the photos taken of your home really set the tone for your sale. The photos need to rock and should always showcase your home in the best light possible. No matter how picture perfect your house might look to you, you should consider the following tips before having your home photographed:


Home Exterior – walk across the street to your neighbor’s house and take a look at your home. Do you like what you see?
  1. Remove cars from the driveway, front of house and garage.
  2. Hide recycling and trash receptacles, garden tools and hoses.
  3. Have lawn cut, mulched and add flowers if weather permits; remove dead anything.
  4. Have windows washed and remove screens if possible.
  5. Power wash walkways, patios, siding if necessary.
  6. Neatly arrange patio furniture, uncover barbecue so scene is set.
Home Interior – take your time and go room to room to enhance the look and feel of each room.
  1. Replace all burned out light bulbs.
  2. Clean and neaten all closets including removal of all items from the floor.
  3. Set the scene in each room by arranging furniture and accessories; remove excess (you may need a stager) to make rooms look open and large. Remember less is more!
  4. Have carpets cleaned and/or stretched if needed. Replace capret if needed.
  5. Touch up paint.
  6. Remove excess art and photos, but not all. You are living in the house after all!
  7. Clean off counters in kitchen and baths; add fresh looking towel sets to bathrooms.
  8. Make sure all beds are made, clothing and personal items are put away neatly.
What have you noticed at open houses you have visited? What did you notice that left you with a negative feeling? Be sure to take care of that in your own home.

Thursday, March 14, 2013

Home Improvements – Some Pay Off, Some Don’t


home improvement
Before you find yourself saying, “What was I thinking?” see what five home upgrades topped last year’s list of loss leaders.

Then take a look at an infographic just published by CAR – California Association of Realtors, with home improvements that do pay off.
home improvement infographic
 

Tuesday, March 12, 2013

Extreme Exterior Paint – Be Careful


Check out these extreme exteriors to learn how your home’s fresh coat can look good and preserve the worth of your home and neighborhood.

Extreme exterior paint

Friday, January 18, 2013

This Week-End’s DIY Project for Team Patereau

caulkWe have cracking caulk in our Master Bathroom. It has led to some moisture seepage and damage to some drywall. We are going to work on this project this week-end so we found a DIY video about caulking that will help a lot. Next, drywall repair. Do you know anything about drywall, or have any advice?


Saturday, January 12, 2013

9 Unexpected Energy (and Money) Savers


Here are a few surprising and simple ways to cut your energy bills this season that we found at HouseLogic.com.
  1. Put lamps in the corners: Did you know you can switch to a lower wattage bulb in a lamp or lower its dimmer switch and not lose a noticeable amount of light? It’s all about placement. When a lamp is placed in a corner, the light reflects off the adjoining walls, which makes the room lighter and brighter.
  2. Switch to a laptop: If you’re reading this article on a laptop, you’re using 1/3 less energy than if you’re reading this on a desktop.
  3. Choose an LCD TV: If you’re among those considering a flat-screen upgrade from your conventional, CRT TV, choose an LCD screen for the biggest energy save.
  4. Give your water heater a blanket: Just like you pile on extra layers in the winter, your hot water heater can use some extra insulation too. A fiberglass insulation blanket is a simple addition that can cut heat loss and save 4% to 9% on the average water-heating bill.
  5. Turn off the burner before you’re done cooking: When you turn off an electric burner, it doesn’t cool off immediately. Use that to your advantage by turning it off early and using the residual heat to finish up your dish.
  6. Add motion sensors: You might be diligent about shutting off unnecessary lights, but your kids? Not so much. Adding motion sensors to playrooms and bedrooms cost only $15 to $50 per light, and ensures you don’t pay for energy that you’re not using.
  7. Spin laundry faster: The faster your washing machine can spin excess water out of your laundry, the less you’ll need to use your dryer. Many newer washers spin clothes so effectively, they cut drying time and energy consumption in half—which results in an equal drop in your dryer’s energy bill.
  8. Use an ice tray: Stop using your automatic icemaker. It increases your fridge’s energy consumption by 14% to 20%. Ice trays, on the other hand, don’t increase your energy costs one iota.
  9. Use the dishwasher: If you think doing your dishes by hand is greener than powering up the dishwasher, you’re wrong. Dishwashers use about 1/3 as much hot water and relieve that much strain from your energy-taxing water heater. Added bonus: you don’t have to wash any dishes.

Tuesday, January 08, 2013

Time to get started on Getting Organized

One of our New Year’s Resolutions is to organize our garage. In the months just before the holidays we were doing some clean-up, fix-up, painting inside the house. A lot of stuff was moved to the garage and a great deal is not going to be moved back in. With the new year, it’s time to address the mess. To get started, we found this video by home organizer Alejandra Costello who demonstrates her system for organizing items you wish to donate, sell, return, or exchange. You designate an area in the home, preferably near an exit, for the stuff you don’t want to forget to take out the door with you. What we really liked best about this video is that she includes tips for keeping your downsizing efforts on track. Hope you enjoy it.